Joining a session
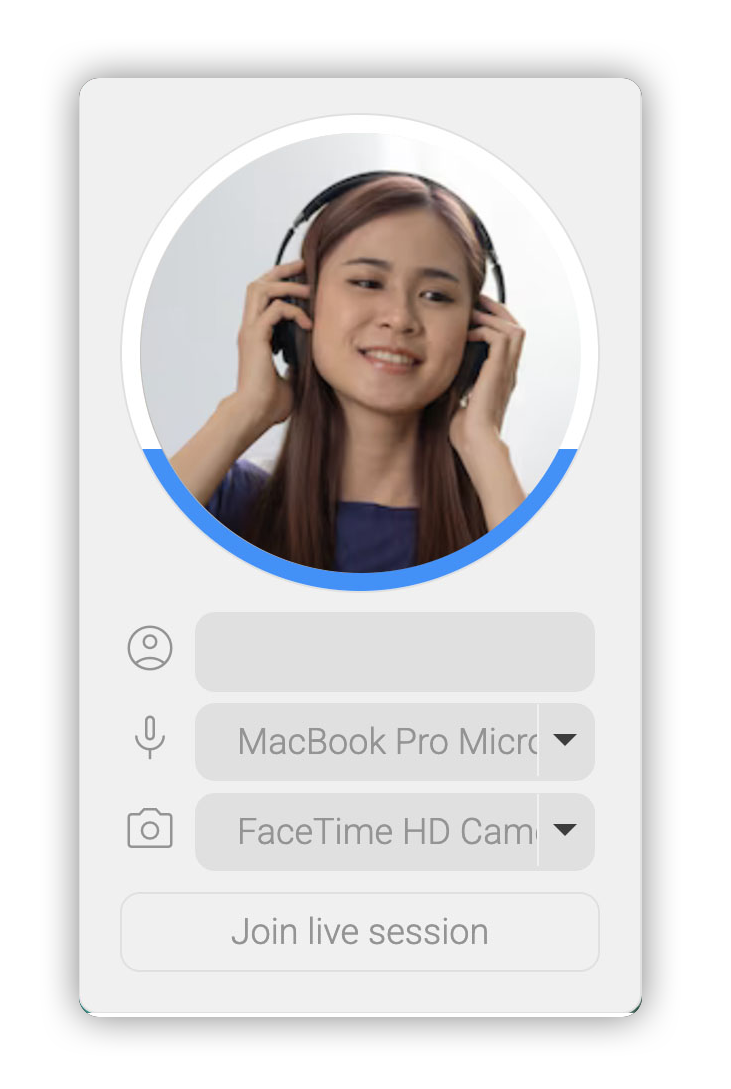
To join a session all you need is an invite link sent by the host
If the link is valid you will be prompted for a user name, the only required information
If you wish, you can select your camera and microphone to participate in voice and video chats
A preview of your camera and a VU meter of your audio will update based on your selected devices
Devices you have allowed access to can be muted or disabled at any time in the setting menu
You may see a popup informing you that you need too allow access to your devices, this is only if you wish to voice chat, you can join without but if you change your mind you will have to re-load the page and follow the prompts to allow access to your devices
No information is stored on our servers, because we don't have any
Main interface
The main interface is divided into three areas
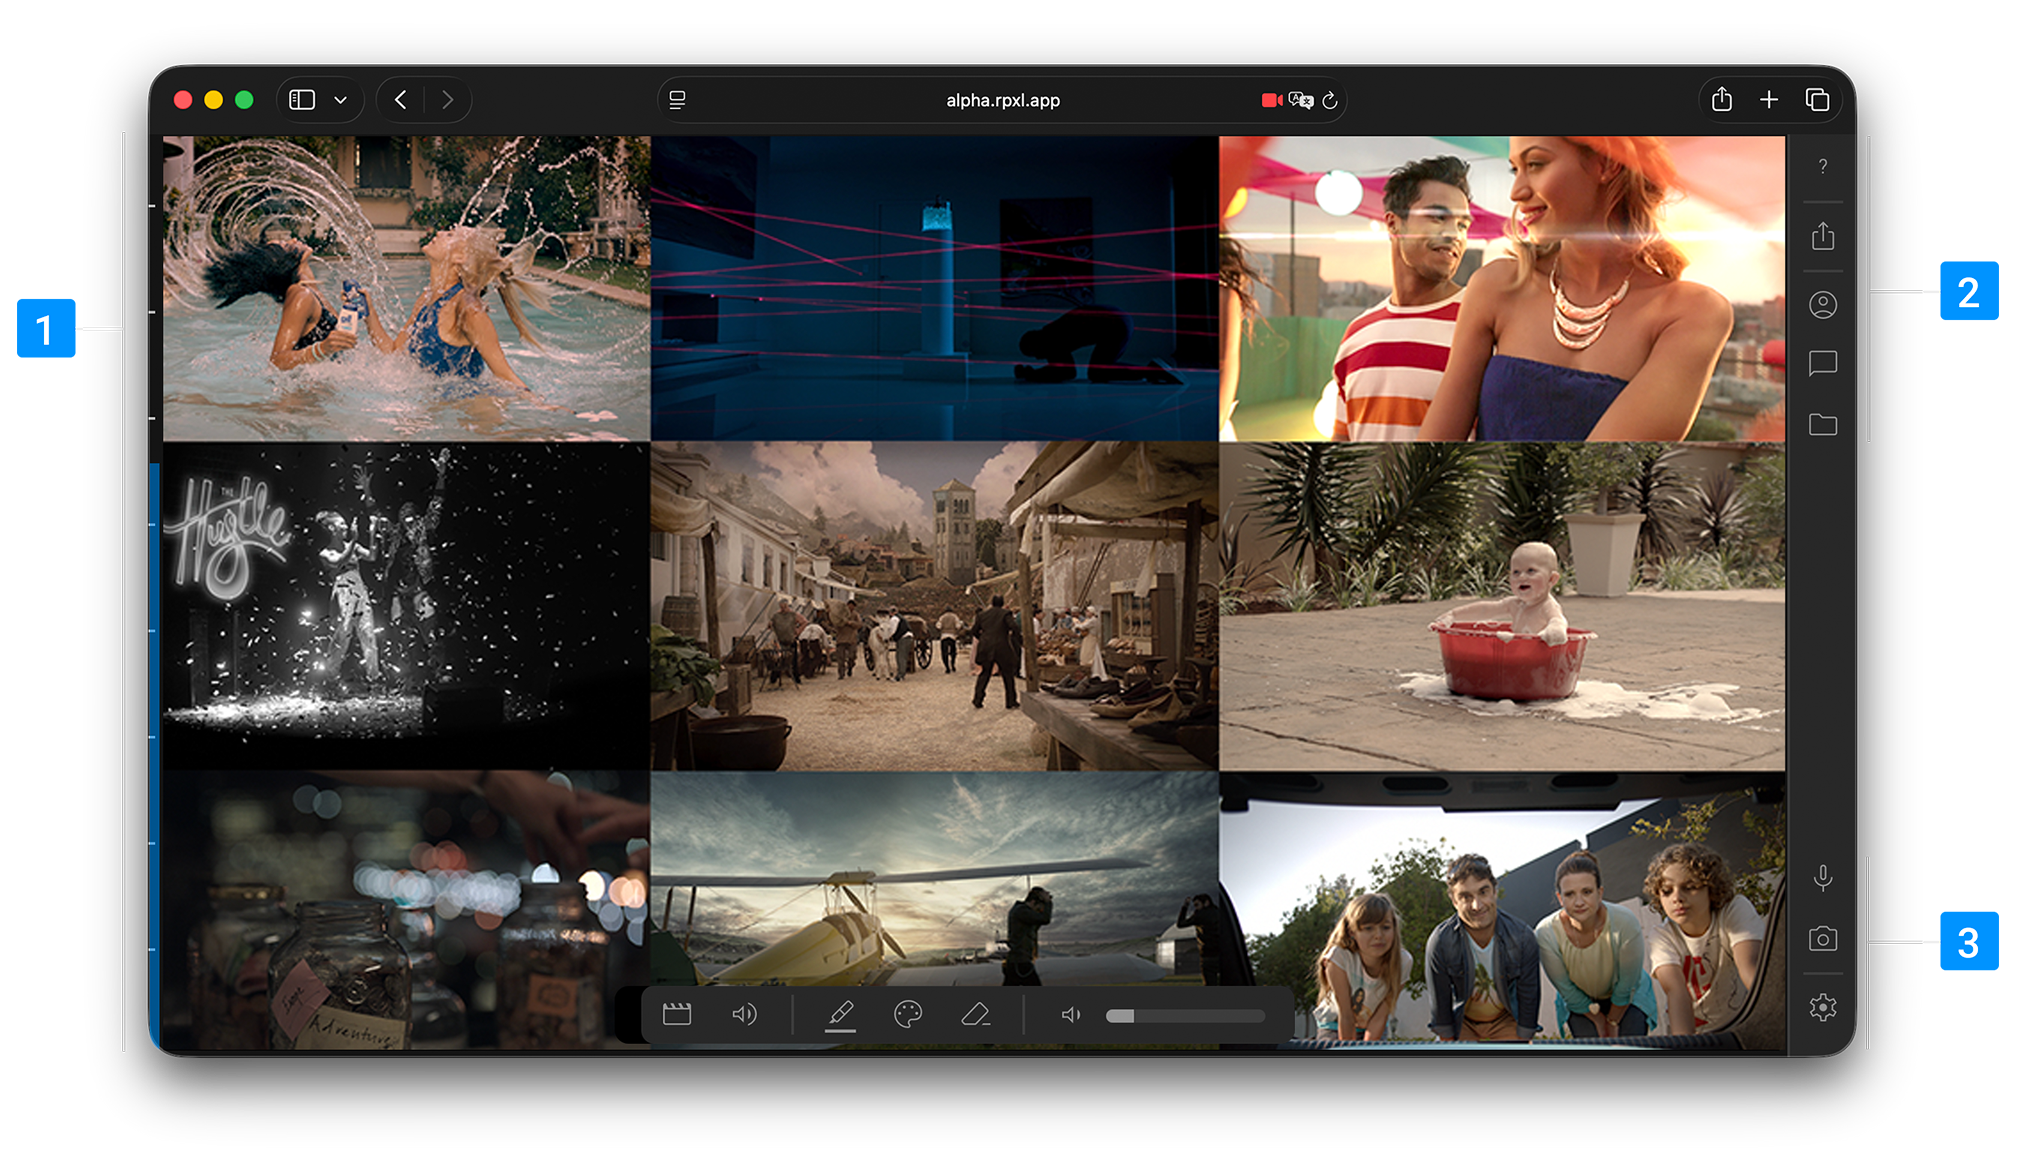
1
Viewer
Main viewing area where you can see the live stream, a VU meter for audio and a horizontal toolbar with various tools
2
Side panels
The side panels provide extra tools for showing connected users, text chats and sending files
3
User area
The aser area allows you to change your user name, microphone or video device, and shortcuts for muting your microphone or camera during a session
Main toolbar
The main toolbar contains tools that allow you to interact with the main stream, it is dynamic and will only display options relevant to the current session, for example, if the host is not sending an audio stream the volume controls will not be available
format_ink_highlighter
Markup pen
Use this tool to draw and markup over the main stream, your markups will be shared between all users and will remain until either you or the host clears them
palette
Pen colour
You can select from a variety of colours for your markups, by default it is set to white
ink_eraser
Eraser
Erases all of your markups only, other users markups can only be deleted by themselves or the host
volume_down
Volume
Allows you to set the volume of the main stream, this does not affect other users, or the users in the vice chat
Side panels
There are three side panels, users, chat and files
account_circle
Users
Shows all the users in the current room. You will be in one of two rooms depending on the host, the main room, and the waiting room. If you are in the waiting room you will not see the main stream, chat or files
Users will either have a pastel icon if they have not selected a camera source or their webcam output will be displayed, if the icon is black they have mted their webcam
Surrounding each user icon is a coloured ring, this displays audio status for the user
Black : user has not selected an audio device and can not talk (though they will still hear you)
Red : user has a microphone but is mute
White / Blue : Vu of user talking, mic is live
chat_bubble
Chat
A simple text chat area, chats are sent to all users and remain throughout the session. Users who join late will receive the full history of messages. You can paste links in the chat, to send or receive files see the files panel
folder
Files
You can send files to other users and receive files from other users in this panel. You can use the two buttons on the top to add individual files or folders. You can also drag and drop files or folders directly on the app window
Files are not uploaded to a server, a link is created to the file on your drive, and users will download directly peer to peer
Files can be sorted by name but by default the latest files uploaded are added to the top of the list
Remote files shared with you are in blue, any files you share will be in grey
Each file will options for either downloading or removing from the share to the right of the name
This system is more for sending smaller files you may need, though, large files can be sent the speed is dependant on each peers connection
Once you leave the session any files you have shared will be removed from the list of files shared
Settings
You can change any of your user settings with the tools below
mic
Microphone
If you have selected a microphone you will be able to mute yourself quickly with this button
photo_camera
Camera
If you have selected a camera you will be able to disable your video stream quickly with this button
settings
Settings
Here you can change your selected microphone or camera device, you can also change your username any time during the session